I've decided something.
I have little to no understanding of Kim Kardashian right now.
1. The fact that she thought platinum blonde hair was a good idea.
2. The fact that she insists on encasing her feet in shoes which resemble cages and make her look about a foot tall.
3. The fact that her derrière is larger than last weeks supermoon, and would definitely block out more sunlight than an eclipse.
and mostly...
4. The fact that recently, my all too frequent Mail Online showbiz section stalking sessions show at least 237265429 articles per day of Kim, seemingly trying to out-misery-gut her other half.
I mean, really?
What is this constant pouty, glum looking facial expression which Kim seems to have adopted more and more of late?
Why is it necessary?
Is she afraid that removing such a pained and sullen look may crease her latest dose of collagen? Or is it the sheer dosage of collagen itself making all facial movement a myth?
One thing's for sure - Kim truly has naff all to be miserable about,
I mean, if my bum could single-handedly-cheekedly (?) *cough* 'break the internet' and draw me enough income to buy China, (and therefore a country big enough to reside my second bum cheek) I'd look pretty bleeding happy.
Hell, I'd be more than happy to simply have an extra hour in bed a day, owed to not having to do my face in the morning.
It really is a pain.
Sadly however, we're not all as lucky as Kim.
We're not all able to use income generated by the size of our bootaaay's, to hire live in Make-up Artist's and look permanently polished, prepped and preened without the usual faffing, flapping and general fussing each time our left eyebrow totes decides not to match its buddy on't right.
#girlproblems
This all changed one Saturday recently however...when I got the chance to go all Kardashian, and have my make-up done by a pro.
Now for me, ladies, (and cheeky blog reading gents) this is a big thing; I haven't had my make-up done since I was twelve, and my friend decided to give me a make-over in the style of a certain citrus fruit in her bedroom, complete with violet eyeshadow, and a lot of sticky glitter stuff.
:|
Claire's Accessories was where it's at peeps.
Anyhow, off I popped to see my Fairy-Lash-Mother, and all round beauty genius, Rachel Brooker.
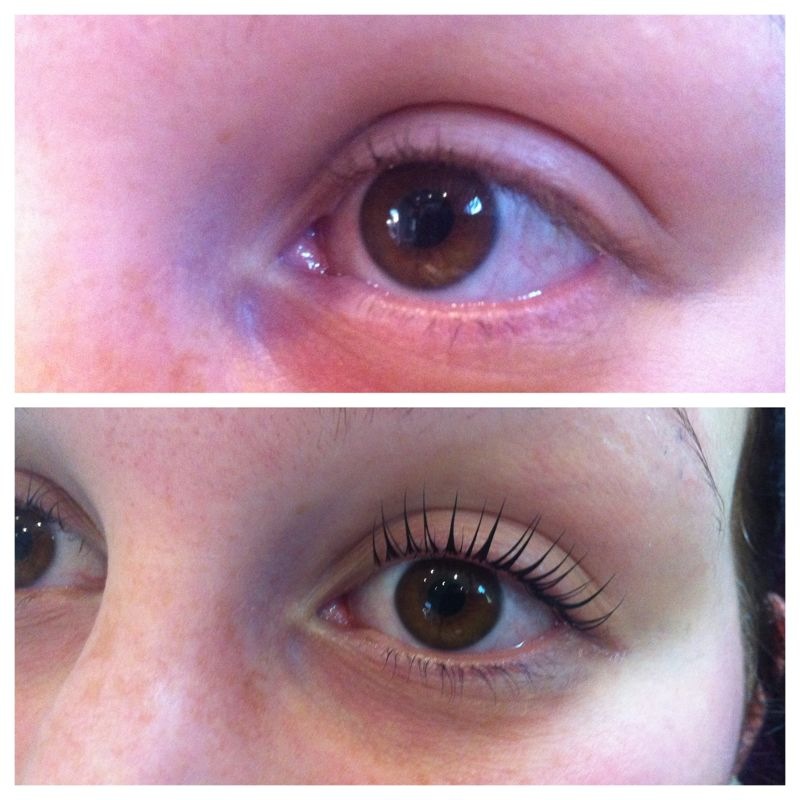
You may remember me raving about her here, and here, when she's single handedly transformed my sadly lacking brows and lashes into, well...ones I didn't know I was capable of
Love me some HD Brows.
<3
Since my last visit, Rachel has furthered her already maaad skillz, to become a HD Brows Elite Trainer and Master Stylist, (can she get an 'oooh'?) so most products and brushes used on me were from the new Make-up by HD Brows range...and they're rather nice I'll have you know!

First job on the list was a fresh HD-ing of my seriously out-grown brows...
(Ta-daa!!)

(Love a good before and after shot - who knew I was capable of growing those badboys? <3)
but then it was on to the make-up...
The look of the day was a perfect base, complete with lots of contouring, a soft smoky eye, lashings of liquid liner, and a natural lip.
Now for this part I'm going to credit Rachel hugely - because she's sent me so many juicy deets about each product, that right now I'm at risk of sounding like I know my shizzle...
So you know guys, right here I'm pretty much just the messenger.
***
Rachel began by buffing Fluid Foundation in shade 2 'Sand' in to my skin, using the Kabuki Brush for a flawless finish. The foundation is a semi-matt, and coverage is adjustable depending on the result you're aiming for; a small amount either alone, or mixed with moisturiser can be buffed into the skin with either a kabuki or stipple brush for a lighter coverage, or for full coverage a larger amount, (Rachel suggests two pumps, or as much as is required for the desired effect) can be used. For a more luminous finish it can also be mixed with an illuminating primer (such as 'L'Oreal Lumi Magique'). The foundation not only feels beautiful on the skin, (in that non-existent, light 'I'm totally not wearing anything' way) but it is also extremely long lasting - something which I can vouch for fully, my face looked exactly the same hours later as it did immediately after application. Reeesult.
To conceal, Rachel used the Conceal and Correct Palette in shade 001 'Light-Medium' under my eyes. Both the foundation and concealer were set with the Translucent Finishing Powder, applied using the Powder Brush, with the Eye Blending Brush being used under my eyes.
To contour, (yusssss contouring ftw!!) Rachel applied shade 'Light Blonde', from the 'Bombshell' 'Eye & Brow Palette'. Now I know what you're thinking...an eye/brow product to contour?!
But it totally works!
To contour, it's great because it's a cool toned light brown, (queue me realising my bronzer ain't so great to contour with...) so really makes it look as though your bone structure really is just THAT good ;)
Yes I can dream.
It was applied with the Contour Brush in the hollows of my cheeks, around my jawline, and my forehead, and with the Eye Blending Brush down the sides of my nose. This made a huge difference for me, as the bridge of my nose is quite wide, (forward facing photo's hate me) and this simple trick slimmed it down beyond recognition.
#whoneedsanosejob?
Blusher, (another first for me!) was used in the shade 'Cosmo', and was applied using the Blusher Brush, and highlight in the lovely champagne toned 'Illuminator' was used on my cheek bones and down the bridge of my nose. I'm a HUGE lover of any kind of highlight, and this was no exception, I look at the photos below and seeing the glow on my cheekbones makes me happier than a kid at Christmas.
Reet, on to the eyes :D
First of all, Eye Primer in shade 'Sand' was applied using the Concealer Brush, to even out the skin tone and prevent any eyeshadow from creasing, as well as allowing the colours to 'pop' and look more vibrant.
Eyeshadow in the shade 'Honey', from the 'Foxy' Eyeshadow Palette was blended into the crease using the Eye Blending Brush, and 'Truffle', also from this palette was used and blended into 'Honey', and into the outer V of my eye, using the Angled Eye Shadow Brush. 'Truffle' was also used on the outer half of my lower lash line (applied with the Smudger Brush).
'Eye Define' pencil liner in 'Intense Black' was blended under the eye to intensify the look, and black 'Duo Gel Liner' was applied along my upper lash line, and winged out using the Fine Angled Brow Brush immaculately - Rachel applied this with such precision and expertise that I seriously applaud her skill here; the liner was identical on each side, and her patience meant it came out perfectly.
The 'Illuminator' previously used on my cheekbones and nose was used across the inner two-thirds of my lid and into my tear-duct to highlight.
Black 'Volumising Mascara' was applied to both my top and bottom lashes - in much smaller amounts than I'd normally use myself, (who knew spider lashes weren't a thing?) and 'Foxy' faux lashes were applied to finish the eyes, (queue my mama actually believing they were my real lashes, and I'd somehow grown them in the couple of hours I was gone ha! Needless to say, she liked them a lot...) once again it was so strange to see my eyes this way, having always been completely useless with false lashes, but I loved them! The 'Foxy' lashes are long in length, but weren't so full on to detract from the rest of the face, and they complimented the rest of the make-up perfectly, they're probably the perfect lashes to use if you're wanting a natural evening look with just a subtle hint of 'boom, yeahh my lashes kick ass'.
Lipgloss in the natural shade 'Vintage' was used to complete the look, and finish my make-up perfectly. I really liked that Rachel used this shade, as normally for myself I'd go all out colour wise, or use nothing - so it was such a great alternative, and has showed me the kind of natural colour which would suit me.


Flash off Flash on
I love this look in general, but have never truly known how to do it and get it right, so to see it applied so immaculately on my face was amazing for me, Rachel is truly a pro.
I've always been more than a little fearful of foundation, (possibly from spending my day as an orange that's rolled in mud, aged twelve) so have stayed away from it altogether. Seeing it on my skin so flawlessly, erased any bad memories and connotations I had - in truth my skin has probably never looked better!
I wouldn't be so fearful of it again, and to know that there's a product out there in Make-up by HD Brows' 'Sand', which can look as good, natural, and glowing as it did, is reassuring. My skin still looked and, more importantly FELT like my skin - just better, (seriously, my mum couldn't stop staring) and in my opinion that's all you could ever want from a foundation.
Now all I'd need is Rachel's expert application skills and I may be half way there haha...
The contouring was something of a revelation; I've ALWAYS contoured my face, and quite frankly I can't get enough, however I've always contoured with bronzer, and using the pale brown shades Rachel did was just so much more natural, and yet so effective, who knows? I may just give it a go...
Overall, I adored this make-up look; I felt so ultra-glamorous and girly, it really was a shame that it all had to come off at the end of the night (why god-dammit?!). I especially loved the contouring and the eyes, (and OBVSSS the 'Illuminator', magpie I am after all) I own the HD Brows 'Foxy' Eye & Brow Palette already, and have often used it to create matte eyeshadow looks, so it's no surprise to me how much I loved the colours in the 'Foxy' Eyeshadow Palette, and the teeny iridescent particles these shades contain - it's been a long while since I last attempted liquid liner, but I used to love it, and have been a little inspired to dig it back out and try it again...although no doubt the chance of me re-creating those flicks with the precision that Rachel did, is more than a bit slim, and I may need a good free afternoon in the mirror before I can show the world.

So sadly, my time in Kim Kardashian's shoes, (not literally her shoes, I pretty much hate every pair she wears) came to an end...
And I can tell you now that I certainly did not adopt her long faced expression during my time in the MUA's chair, (mehh, I've got no collagen to crease in these cheeks) and in all honesty I was chuffed to bits with how my make-up looked.
It was something very different and a fresh look for me, while still encompassing all the things I love most in my own make-up looks, a smokey eye, highlight, and contouring.
Rachel is ultra professional and a true talent; there's a reason why I call her my Fairy-Lash-Mother, she's experienced, creative and extremely passionate about what she does, (not to mention genuinely lovely) and it shows.
She recently started her own business, and has a beauty room within her Huddersfield home, in the form of 'Beauty, Brows and Make-up Artistry by Rachel', and having visited it, it really is something special, and testament to the hard work she's put in to her career, constantly updating her skills and qualifications.
*Little disclaimer here: I'm in no way affiliated with Rachel or HD Brows, and am not being paid/sponsored to post this, Rachel is merely a brilliant beauty therapist and make-up artist, and simply deserves a little recognition for it :)
I can't thank Rachel enough for doing my brows and make-up for me, I was well and truly pampered during my visit, and I can't wait to go back, (which I am next week in fact for some LVL lash goodness, woop!) I'll no doubt be causing myself endless wrinkles with the silly grin that is sure to be plastered across my face once she's done, in totally non-Kim Kardashian-esque fashion.
Ah well...never understood her anyway.
Wouldn't mind her live-in MUA though...
You can find Rachel via:
Facebook
Her website
Twitter
Email: rachel-brooker@hotmail.co.uk
or contact on the phone directly on: 07990525258.
Also, cos we're lucky little so-and-so's, Rachel has kindly shared her stylist code, which allows you to receive a free brush when you spend over £35 on myhdbrows.com.
Her code is E950 and you can pop it in this little box right here.
Told you she was good ;)
It was something very different and a fresh look for me, while still encompassing all the things I love most in my own make-up looks, a smokey eye, highlight, and contouring.
Rachel is ultra professional and a true talent; there's a reason why I call her my Fairy-Lash-Mother, she's experienced, creative and extremely passionate about what she does, (not to mention genuinely lovely) and it shows.
She recently started her own business, and has a beauty room within her Huddersfield home, in the form of 'Beauty, Brows and Make-up Artistry by Rachel', and having visited it, it really is something special, and testament to the hard work she's put in to her career, constantly updating her skills and qualifications.
*Little disclaimer here: I'm in no way affiliated with Rachel or HD Brows, and am not being paid/sponsored to post this, Rachel is merely a brilliant beauty therapist and make-up artist, and simply deserves a little recognition for it :)
I can't thank Rachel enough for doing my brows and make-up for me, I was well and truly pampered during my visit, and I can't wait to go back, (which I am next week in fact for some LVL lash goodness, woop!) I'll no doubt be causing myself endless wrinkles with the silly grin that is sure to be plastered across my face once she's done, in totally non-Kim Kardashian-esque fashion.
Ah well...never understood her anyway.
Wouldn't mind her live-in MUA though...
You can find Rachel via:
Her website
Email: rachel-brooker@hotmail.co.uk
or contact on the phone directly on: 07990525258.
Also, cos we're lucky little so-and-so's, Rachel has kindly shared her stylist code, which allows you to receive a free brush when you spend over £35 on myhdbrows.com.
Her code is E950 and you can pop it in this little box right here.
Told you she was good ;)